Why Waterproof Ratings Don’t Mean Dry — Why Many People Buy “High Waterproof” Tents and Still Get Wet
Part 1: Why This Matters (Beginner’s Perspective)
When buying their first tent, most people’s first stop is the “waterproof” spec.
You’ll see product pages with statements like these:
- Outer fly: 2000mm
- Floor: 3000mm
- Fully taped seams
- Storm-rated
- Professional outdoor waterproofing
It looks straightforward:
Bigger number = better rain protection.
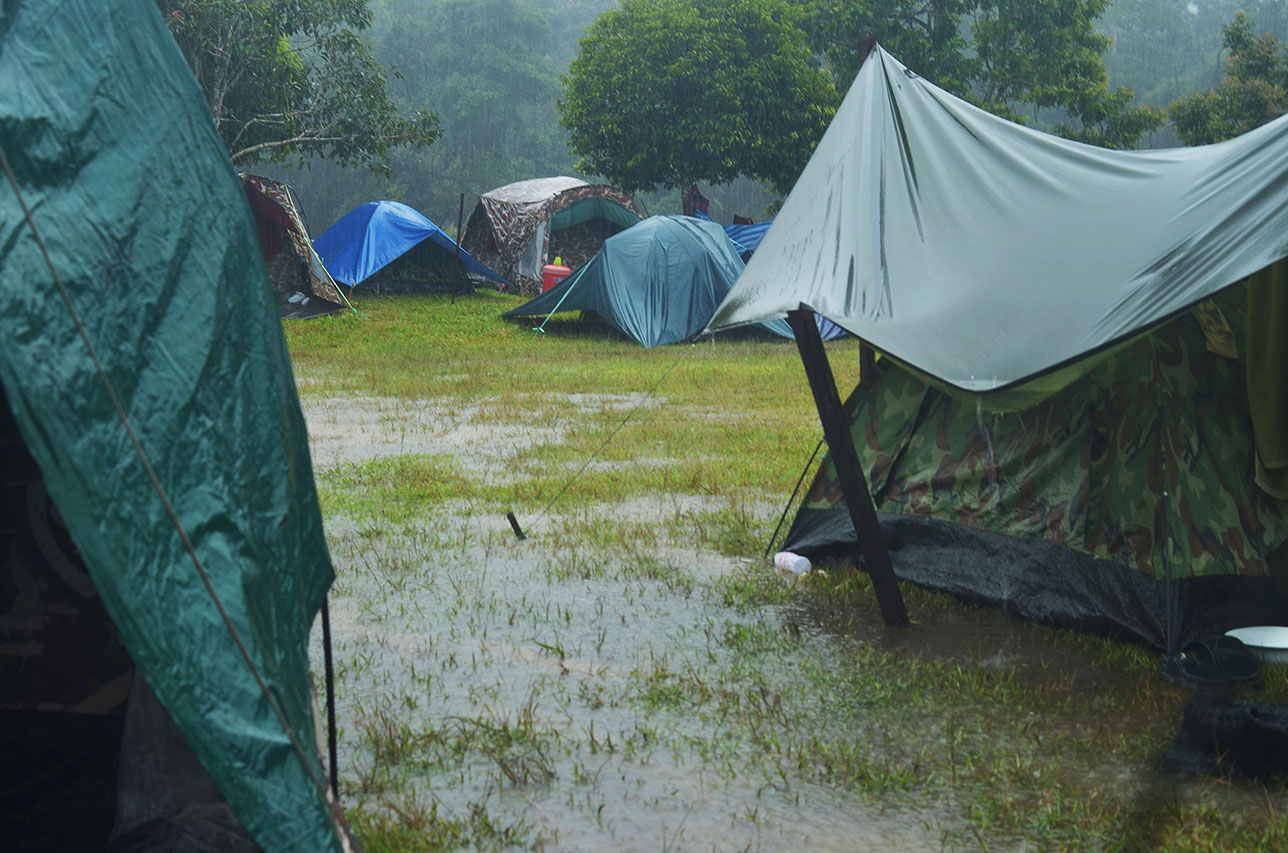
But then you actually go camping, and things don’t always work out that way.
Plenty of first-time campers wake up in the middle of a rainy night to find water inside their tent, and their first conclusion is: “This tent doesn’t waterproof well.”
But look more closely, and the problem often isn’t the fabric at all:
- The outer fly wasn’t pulled taut, and water pooled somewhere
- The ground underneath was already a soggy low point
- The seam sealing is average, and after extended rain, water slowly seeps through the stitching
- The door faces the wind, and rain blows in every time you open it
- It’s not actually leaking — it’s condensation
This is where tent waterproofing gets most people confused:
You see one number, but what you’re dealing with out in the field is the performance of an entire system.
That system includes:
- The fabric’s hydrostatic head rating
- The condition of the coating
- Seams and seam taping
- Whether the outer fly is designed to shed water
- Whether the floor can handle ground moisture and body weight pressure
- Your pitching technique
- Where you set up camp
- That night’s wind, rain, humidity, and temperature swing
In other words, waterproof ratings are useful, but they’re far from the whole picture.
The biggest trap for beginners is oversimplifying “waterproof rating” into just one number.
Thinking that buying a tent with a high number equals owning a shelter that won’t let you down in any weather.
Real camping isn’t a lab.
Some tents don’t have jaw-dropping specs on paper but perform reliably in the field.
Others look impressive on the spec sheet but fall apart in a single windy, rainy night.
So if you actually want to understand tent waterproofing, you can’t just compare 2000mm vs 3000mm.
You need to understand:
- What this number actually means
- Where its limits are
- Why even high numbers can still let water through
- How to evaluate the fly, floor, and seams separately
- What experienced outdoor campers from other countries actually care about
- What beginners should prioritize when buying
This article lays all of that out clearly.
Part 2: How Experienced Campers From Other Countries Think About “Waterproof”
If you browse Western camping forums, YouTube reviews, and hiking blogs, you’ll notice something interesting:
They do look at waterproof ratings, but they almost never focus only on the numbers.
What experienced campers actually ask is more like this:
- How does this tent perform during sustained rainfall?
- How reliable is the floor on wet ground?
- How well are the seams handled?
- After the fly is pitched taut, will it pool water?
- When you open the door in the rain, will water blow in?
- Is this tent better suited for weekend car camping or ultralight backpacking?
Notice what’s happening: they’re talking about real-world performance, not paper specs.
There’s a way of thinking here that’s worth learning:
Waterproofing isn’t an isolated spec — it’s a combined result that plays out in specific conditions.
Experienced campers start by matching tents to use cases.
1. Weekend and Car Camping
For car camping, base camping, and casual weekend trips, what matters most is:
- Is the structure stable?
- How forgiving is it if you pitch it imperfectly?
- Does it stay comfortable in the rain without constant tweaking?
- Are the footprint and vestibule practical enough?
These users don’t necessarily chase ultralight weight, but they care a lot about “low maintenance.”
2. Hiking and Ultralight Camping
For backpacking, long-distance walking, and ultralight priorities, there’s a different trade-off:
- Specs don’t need to max out
- But structure, material quality, and pitch design matter more
- More reliance on skill to manage wind, rain, condensation, and campsite selection
This explains why many lightweight tents from established brands have waterproof specs that don’t look dramatic on paper, yet have strong user reviews.
It’s not that they don’t care about waterproofing — it’s that they know what actually keeps you dry is the whole system plus how you use it.
3. High-Humidity and Rainy Environments
In places like the UK, Scandinavia, forests, lakesides, and humid mountain terrain, experienced campers focus more on:
- Footprint waterproofing and bathtub floor design
- Seam taping quality
- Outer fly drainage capability
- Condensation management
- How doors and openings perform in rain
In mature outdoor cultures, “waterproof” has never just meant “keeps rain out.”
It’s more like asking:
Can this tent, in real weather, reliably keep you separated from water?
Part 3: What Waterproof Rating Actually Means — Let’s Get This Spec Clear
Most people have seen numbers like 2000mm, 3000mm, and 5000mm, but few truly understand what they represent.
1. Waterproof Rating Is Essentially “Water Pressure Resistance”
The standard English term is Hydrostatic Head, which comes from a hydrostatic pressure test.
The simple explanation:
At what water pressure does a piece of fabric start allowing water through?
For example, when a fabric is rated 3000mm, it generally means:
In a lab test, this fabric can withstand pressure equivalent to a 3000mm column of water without significant seepage.
So this number measures the material’s resistance to water pressure.
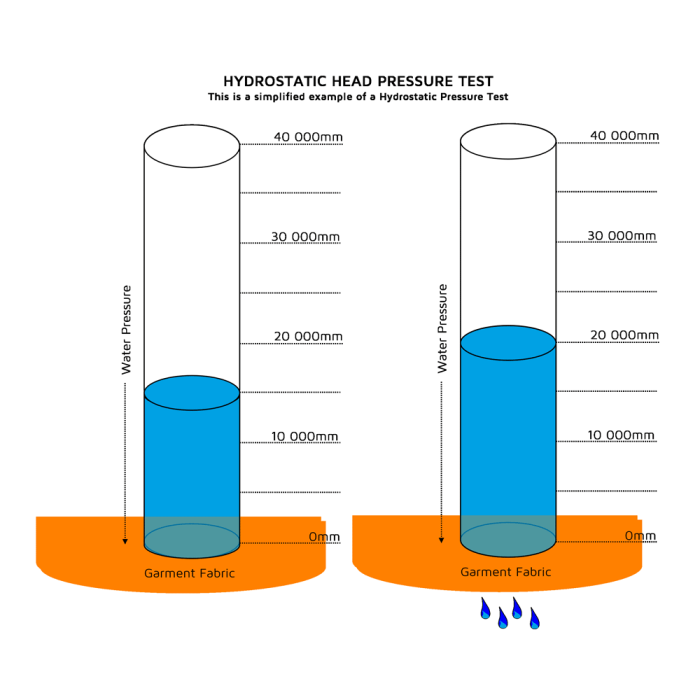
The hydrostatic head test measures how much water pressure a fabric can withstand before leaking
2. It Has Real Reference Value, But It’s Not the Final Answer
This is where the biggest misunderstandings happen.
The waterproof rating tests fabric, not the complete tent.
It doesn’t directly tell you:
- Whether seams will leak
- Whether the floor will let water seep through under your body weight
- Whether the structure holds up when wind and rain hit together
- Whether the outer fly will pool water
- Whether rain blows in every time you open the door
So the more accurate framing is:
3. Why Lab Numbers Don’t Directly Equal Field Performance
Waterproof rating describes a tent material’s baseline capability — not its ultimate performance in the field.
Because lab testing is controlled and consistent, while the real outdoors is variable and unpredictable.
In a lab:
- Water pressure is stable
- Angle is fixed
- Time is controlled
- Material condition is ideal
In the field, it’s nothing like that:
- Rain is pushed by wind and hits at angles
- Raindrops have impact force — they don’t sit still on fabric
- The ground gets wet and pools
- You’re moving around inside the tent, pressing on the floor
- Fly tension changes with moisture and wind
So the same 3000mm rating doesn’t feel the same in a lab vs. a stormy mountain night.
4. Is a Higher Number Always Better?
For pure material resistance, a higher number usually means harder to penetrate.
But choosing a tent isn’t as simple as “higher is better.”
Higher ratings often come with trade-offs:
- Can mean more weight
- Thicker coatings
- Different overall balance
- Some ultralight tents aren’t trying to solve problems by stacking numbers
So the smarter approach isn’t “chase the highest number” — it’s:
Part 4: The Fly, Floor, and Seams — Evaluate Each One Separately
Does this rating match my actual use case?
When checking tent waterproofing, the most common beginner mistake is looking at one overall rating.
But different parts of a tent handle completely different jobs.
1. The Outer Fly: Primarily Responsible for Blocking and Shedding Rain
The outer fly directly faces:
- Falling rain
- Wind-driven rain at angles
- Prolonged rainfall
- Localized water pooling pressure
So evaluating the fly isn’t just about the fabric rating — it’s also about:
- Whether the shape and angles promote good water runoff
- Whether there are areas prone to pooling
- Whether it drains quickly once taut
- Whether seams and the peak are reliable
Some tents have fly ratings that aren’t extraordinarily high, but with good structure, clean lines, and fast water shedding, they still perform reliably in practice.
2. The Floor: Often More Problematic Than the Fly
This is the part most first-time campers overlook the most.
The floor isn’t dealing with “raindrops falling on it” — it’s dealing with:
- Ground moisture from below
- Mud and standing water
- Your body weight
- Localized high pressure from knees, hips, and elbows
This is why many tent floors are rated higher than the fly.
Because the floor has to handle something very specific:
Water isn’t seeping down from above — it’s being pushed up by pressure from below.
This is especially common on grass, lakesides, forests, and muddy ground after rain.
Body weight creates pressure that can push water up through the floor fabric
3. Seams: The Most Overlooked Weak Point
The fabric itself can be highly waterproof, but as soon as it’s stitched together, it leaves thousands of tiny needle holes.
If these aren’t treated, they become likely entry points for water.
This is where those terms come in:
- Fully taped
- Seam taped
- Seam sealed
These aren’t marketing fluff — they’re real factors that determine whether you stay dry.
Many tents don’t have a fabric problem at all. The issues are:
- A certain seam takes prolonged direct rain
- The ridge seam taping wasn’t fully applied
- The floor edge stitching slowly lets water through
- On older tents, the taping has started to peel
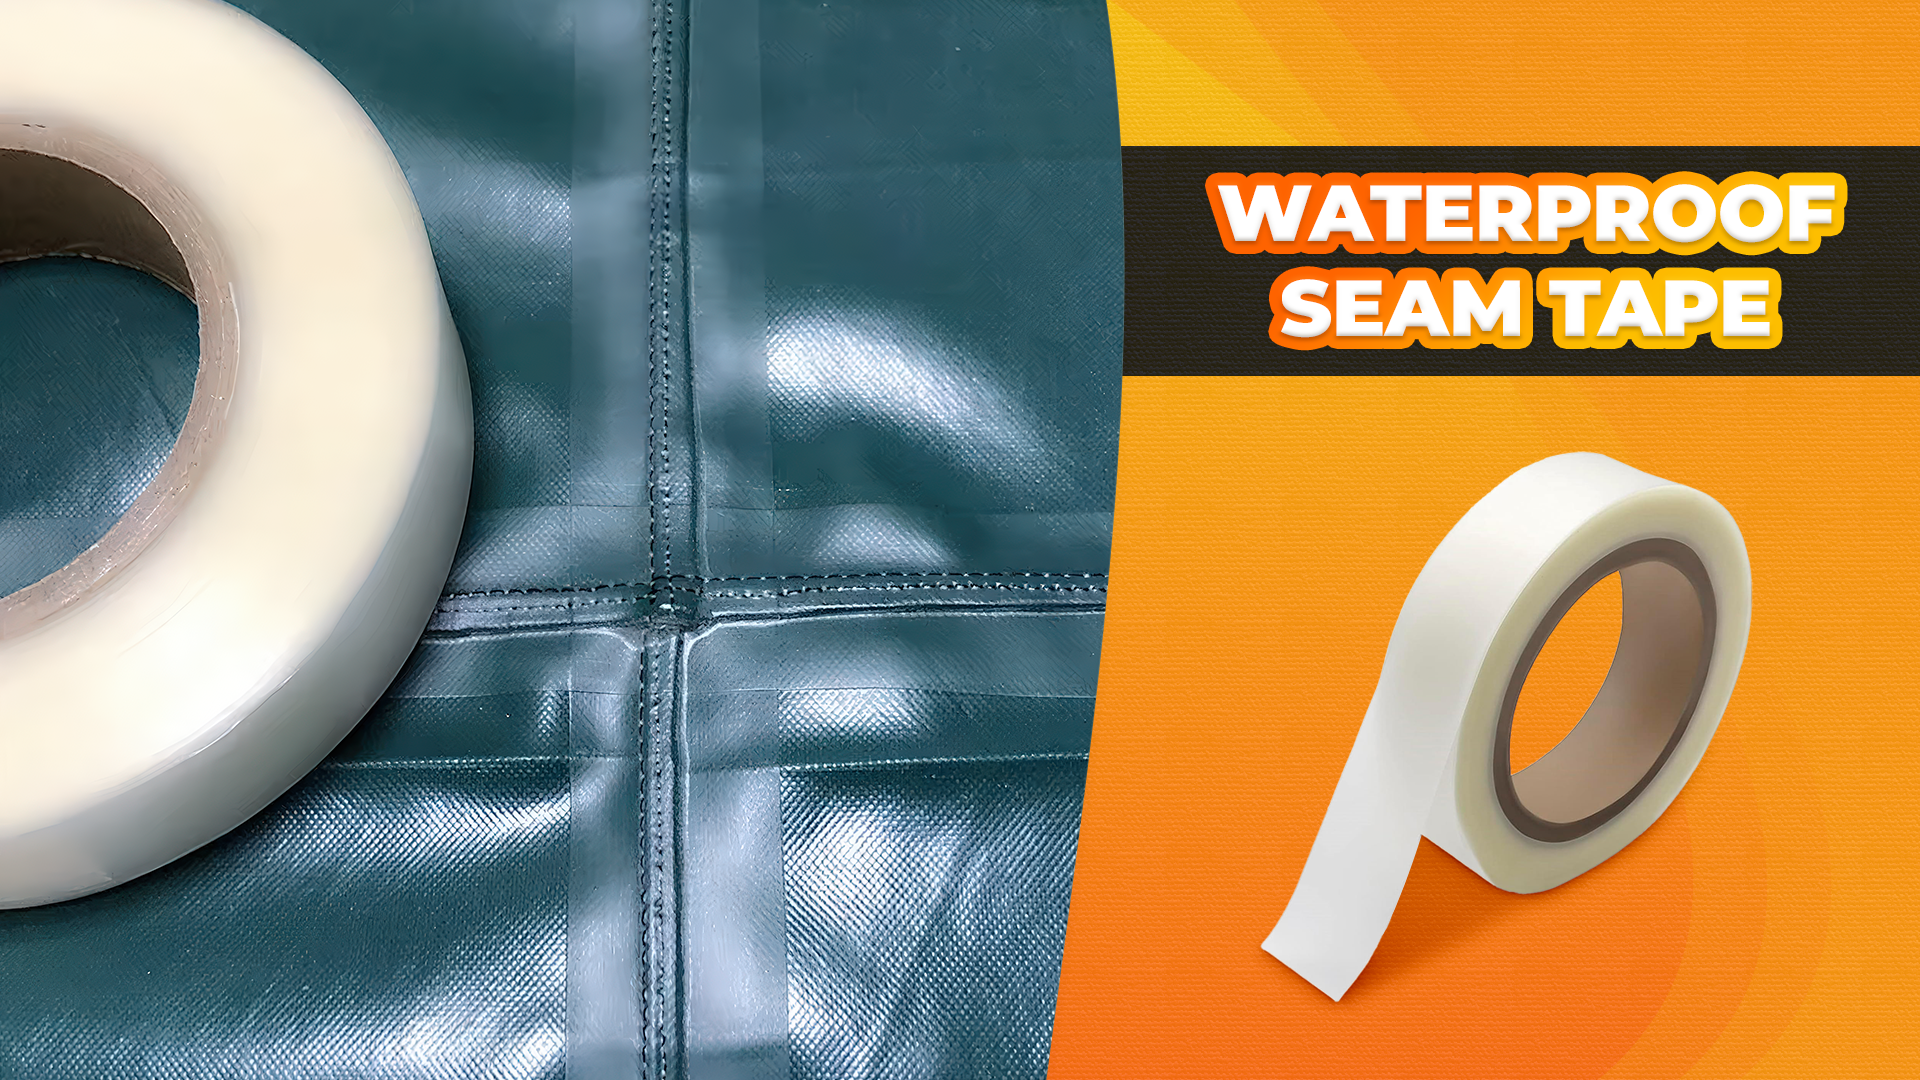
Taped seams cover the needle holes left by stitching to prevent water from seeping through
Part 5: How to Actually Evaluate Taping and Seam Seal
Since seams are this important, they deserve their own section.
1. What Is Taping?
Taping usually means applying waterproof tape to the inside of stitched seams to cover the needle holes.
For regular users, this is the most worry-free approach because it’s typically factory-applied.
If a tent clearly states “fully taped,” it generally means the seams have received at least a reasonably complete baseline waterproof treatment.
2. What Is Seam Seal?
Seam seal is more like “seam waterproofing.”
Some tents come with it factory-applied; some require the user to do it themselves.
In the Western ultralight community, doing your own seam sealing is common practice.
But if you’re a beginner with limited time and not looking for extra work, you’re better off choosing:
- Clear factory treatment
- No need for additional sealing work on your part
- Products with consistent positive seam reviews from users
3. Taping Isn’t Permanently Problem-Free Either
This one catches a lot of people off guard.
Tents stored wet, folded while damp, abraded through use, or left in hot conditions for long periods — all of this can cause taping to degrade over time.
So an older tent with good specs doesn’t mean it’s still in peak condition today.
Part 6: Why Even High Waterproof Ratings Can Still Leave You Wet
This is the most important section to fully understand.
Many people think:
“I bought a highly waterproof tent — why am I still getting wet?”
The reasons usually aren’t single factors. It’s often multiple issues stacking together.
1. High Numbers Mean Strong Fabric — Not a Strong Overall System
A high fly rating doesn’t automatically mean:
- The door won’t let rain in
- Seams are absolutely leak-proof
- The floor can handle wet ground and body pressure
- The structure will hold in wind and rain
So you can’t treat “highly waterproof” as shorthand for “this entire tent performs well in all conditions.”
2. A Loose Fly Lets Water Pool Too Long
Many tents don’t fail because the fabric can’t handle it — they fail because they were pitched too loosely.
When the fly has slack somewhere:
- Water doesn’t shed quickly and can pool
- This creates prolonged localized pressure
- The fly can touch the inner tent
- Certain seams take sustained high load
At that point, even the best spec gets undermined by your pitch.
3. Wrong Terrain — Water Comes From Below
This one is extremely common.
For example, you set up on:
- A subtle low point
- Thick grass that’s very damp
- A lakeside, streamside, or shaded forest spot
- An area where rainwater naturally flows toward
In these spots, your most likely problem isn’t a leaking top — it’s gradual ground moisture seeping upward through the floor.
4. The Rain Didn’t Leak In — You Brought It In
On many rainy nights, the tent gets wet not because the fabric leaks, but because of these details:
- Wet shoes brought directly into the inner tent
- Wet rain jacket placed near the sleeping area
- Rain blowing in every time you open the door
- Door facing into the wind, and as soon as you unzip everything gets chaos
This is why vestibule and door design matters far more than most beginners realize.
5. Condensation Gets Mistaken for Leaking
This is arguably the most common misdiagnosis among new campers.
If you wake up with water droplets all over the inner walls, it isn’t necessarily a leak.
It could just be:
- A large temperature swing overnight
- High humidity
- Insufficient ventilation inside the tent
- Your breath and moisture condensing on the inner walls
This feeling is especially pronounced in single-wall tents.
So the next time you see “water inside the tent,” don’t immediately blame poor waterproofing.
First ask yourself:
- Are seams channeling water?
- Is ground moisture coming up through the floor?
- Is rain blowing in at the door?
- Or is this condensation?
Part 7: Two Real Scenarios Show Exactly Where Problems Come From
Case 1: Same Tent, Two Completely Different Outcomes
Scenario: Standard grass campsite, steady light to moderate rain overnight.
Camper A’s approach:
- Pitches wherever looks flat
- Didn’t pay much attention to whether it was a low point
- No footprint used
- Door faces into the wind
- Fly wasn’t especially taut
Result:
- Door area got wet
- Ground felt damp
- Water pooling marks in one spot
- They concluded the tent has poor waterproofing
Camper B’s approach:
- Chose a slightly elevated spot
- Used a footprint
- Fly was taut
- Door faced away from the wind
- Wet gear left in the vestibule
Result:
- Basically fine through the night
Same tent. The difference wasn’t in the specs — it was in:
- Terrain selection
- Pitch tension
- Footprint protection
- Door orientation
- Rain-side behavior habits
Case 2: Outer Fly Didn’t Leak, But the Floor Was Damp by Morning
This is especially common on lakesides, grasslands, and forest floors.
What you’ll notice:
- The top looks fine
- Seams aren’t visibly leaking
- But the area under the sleeping pad feels damp, especially where body weight pressed down
This is usually the floor taking too much pressure on wet ground.
In other words, water wasn’t leaking down — it was being pushed up.
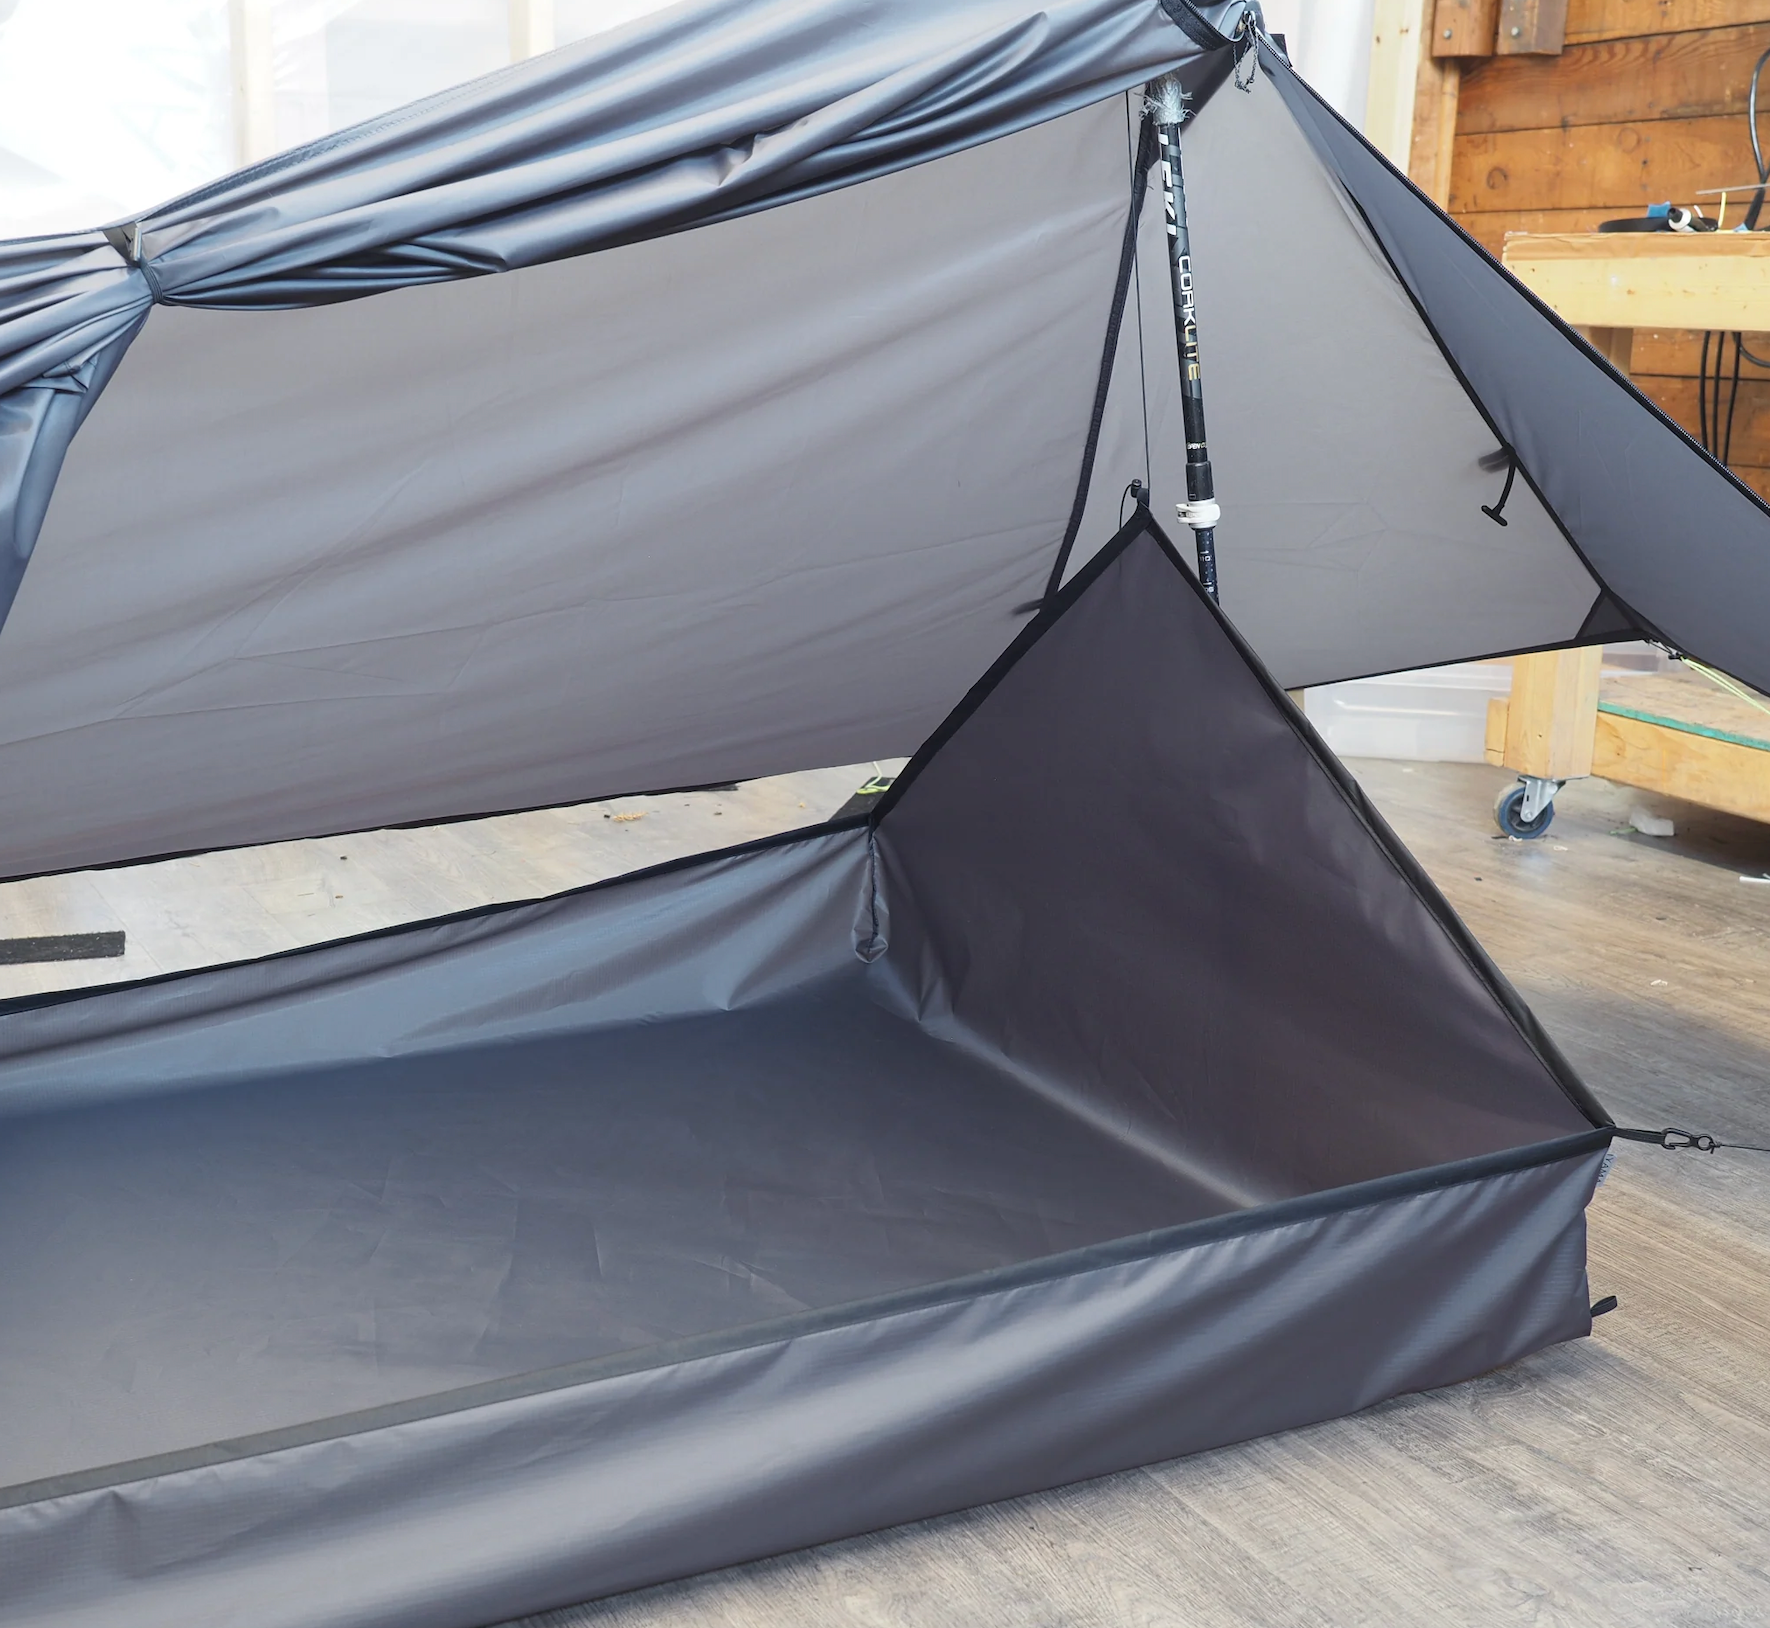
A bathtub floor design with raised edges helps prevent water from being pushed up through the seams
Part 8: What Experienced Campers From Other Countries Actually Value More
If you distill the wisdom from experienced outdoor campers internationally, here’s what they actually prioritize when evaluating waterproofing:
1. Overall Structure, Not a Single Number
They look at:
- Whether the fly angle promotes good water runoff
- Whether pooling is likely
- Whether the vestibule is usable
- Whether the floor has a bathtub design
- Whether the inner and outer tent relationship makes sense
2. Seams and Real-World Reviews
Experienced campers know many tent failures happen at the details, not the fabric.
So they care about:
- How stable the taping is
- How key seams are handled
- What long-term user reviews say
3. Understanding the Tent’s Limits
This one is critical.
Mature campers don’t ask “is this tent an all-rounder?” — they ask:
- What weather is it best suited for?
- Where are its limits?
- Who is it actually designed for?
This mindset is far more useful than “higher waterproofing is always better,” and much more realistic.
Part 9: How Beginners Should Actually Judge Waterproofing When Buying
If you’re an average camper with limited time and not looking to become a gear expert, here’s the order I’d suggest:
1. Start With Your Use Case
First ask yourself:
- Am I weekend car camping or backpacking?
- Do I mostly camp on grasslands, lakesides, mountains — or mostly in stable weather?
- Do I frequently encounter wet ground and rainy conditions?
2. Evaluate the Fly and Floor Separately
Don’t just look at a headline saying “highly waterproof.”
Check:
- Fly rating: how many mm?
- Floor rating: how many mm?
- Are both clearly stated?
3. Pay Special Attention to Seam Treatment
This one is non-negotiable.
If a product page is vague about seam treatment, I’d be cautious.
4. Check Whether the Structure Is User-Friendly
For example:
- Does it have a vestibule?
- Is the floor a bathtub design?
- Is the fly easy to tension properly?
- Does the shape clearly create pooling risks?
5. Check Whether It’s Beginner-Friendly
Some tents have good specs but demand experience to get the best out of them.
If you just want stable, comfortable camping right now, “forgiving of imperfect setups” matters more than “exciting specs on paper.”
Part 10: Advanced Tips
Tip 1: When You Arrive at Camp, Think About “Where Will Water Flow?”
Don’t just check if the ground is level.
Take a moment to observe:
- Are there low points?
- Is the ground too soft or too damp?
- Will surrounding rainwater naturally drain toward your spot?
These two minutes are often worth more than an extra 1000mm on the spec sheet.
Tip 2: Treat “Tightening the Fly” as a Waterproofing Action
Many people think wind lines are only for wind resistance — but they matter just as much for waterproofing.
When the fly is taut:
- Water sheds more easily
- Pooling is less likely
- The fly stays off the inner tent
- Certain seams bear load more evenly
Tip 3: Dry Your Tent Before Packing It Away
This applies especially to tents with PU coatings and taped seams.
Packing it damp once or twice probably won’t cause immediate damage. But over time, the problems will show up.
Part 11: Summary
If you only remember one thing from this article, I hope it’s this:
Tent waterproofing isn’t about one number — it’s about whether an entire system can reliably keep you separated from water.
Waterproof ratings do have reference value, but they only answer one question: “What’s the material’s baseline capability?”
What actually determines whether you stay dry also includes:
- How the fly and floor each perform
- Whether seams and taping are reliable
- Whether the structure creates pooling risks
- Whether your campsite and pitch technique are appropriate
- Whether you’re dealing with leaking, ground seepage, or condensation
So next time you’re buying a tent, stop asking only “is this number high enough?”
Ask instead:
- Is this tent reliable in my actual use conditions?
- Is it a dependable overall system?
- Is it friendly to someone like me?
Once you start looking at tents this way, your judgment improves immediately.
Part 12: Q&A
Q1: Is 3000mm always better than 2000mm?
On pure material resistance, usually yes — it’s harder to penetrate.
But in terms of the complete tent, a higher number doesn’t automatically mean more reliable. Structure, seams, floor design, and usage habits all factor in too.
Q2: Why Is the Floor Rating Often Higher Than the Fly?
Because the floor is dealing with ground moisture and body pressure.
More often than not, water is being pushed up from below — not dripping down from above.
Q3: Does Condensation Count as Poor Waterproofing?
Not necessarily.
Condensation is more the result of ventilation, humidity, temperature swings, and structure — not the same as rain penetrating the tent from outside.
Q4: Does Fully Taped Mean Absolutely No Leaking?
No.
Taping is important, but it degrades over time. Pitch technique and environment also affect outcomes.
Q5: What’s the Safest Choice for Beginners?
Usually:
- A structurally proven double-wall tent
- Clear specs for both fly and floor
- Defined seam treatment
- Has a vestibule
- Bathtub floor design
- Forgiving of imperfect setups
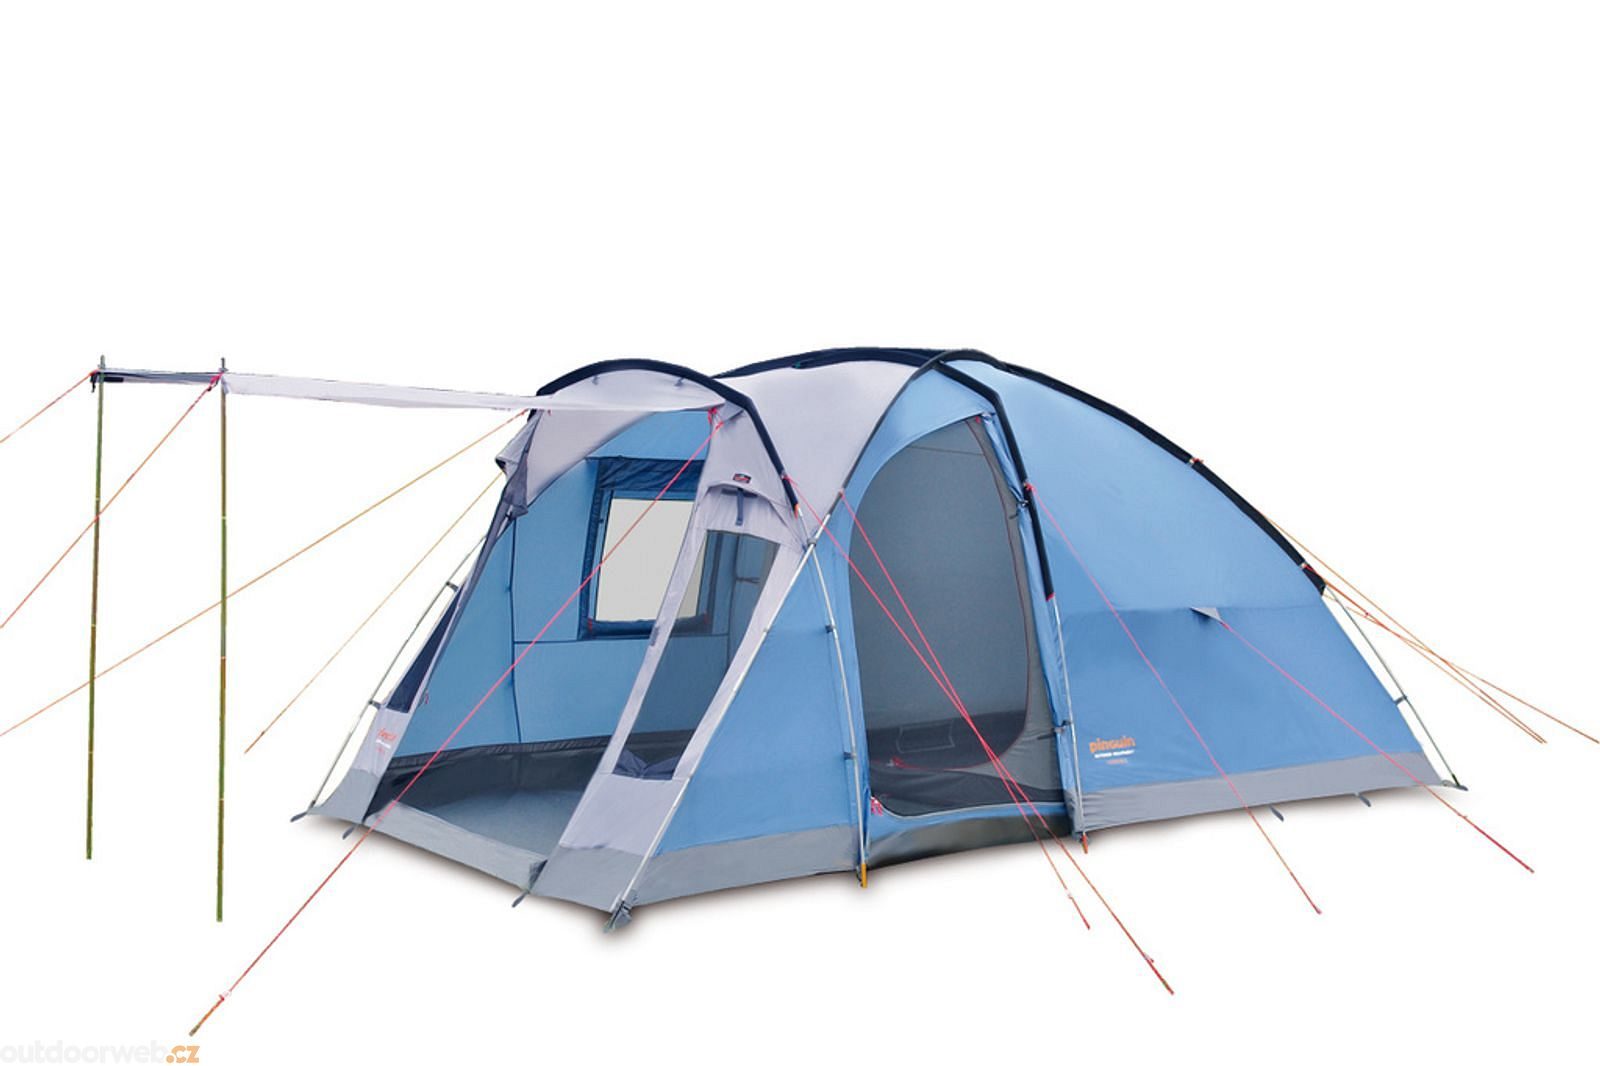
A well-designed tent addresses waterproofing across all components: fly, floor, seams, and vestibule